Define a new filter
|
Define a new filter |
|
|
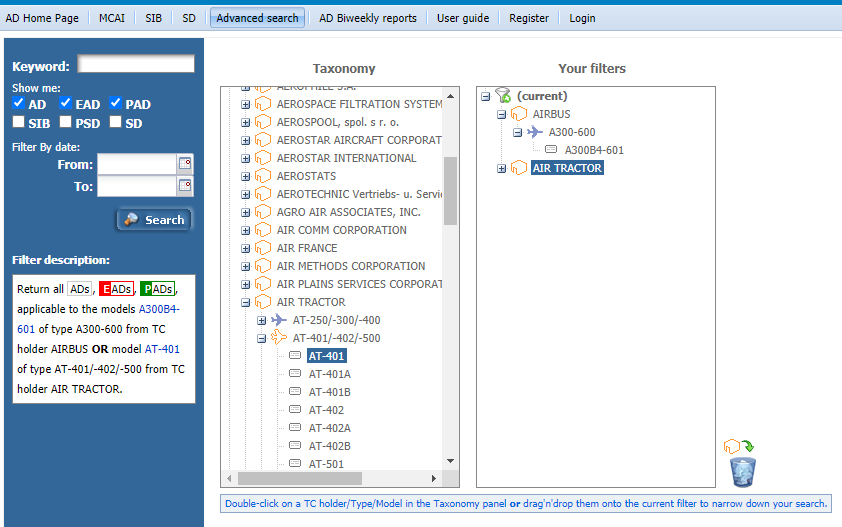
To define a new filter, first make sure that the current filter is selected in your list of filters. If you haven't clicked on another filter, then the current filter is considered selected by default.
Double-click on any node in the Taxonomy panel to add it to the current filter, just like you would do in the advanced search page. You can define any additional criteria like a keyword, publication class, starting and ending issue dates. When you are satisfied with your criteria, you have to specify a name in the "Filter name" field and click on the "Save" button inside the blue panel on the left. If everything is ok, you will get a notification message that your filter has been successfully saved and you will now be able to see it in the list of filters.
Hint:
|